Table of Contents
Sync Sensor Installation for Shugart
Installation of this sync sensor is pretty straightforward, but small hands help.
What you need for this installation
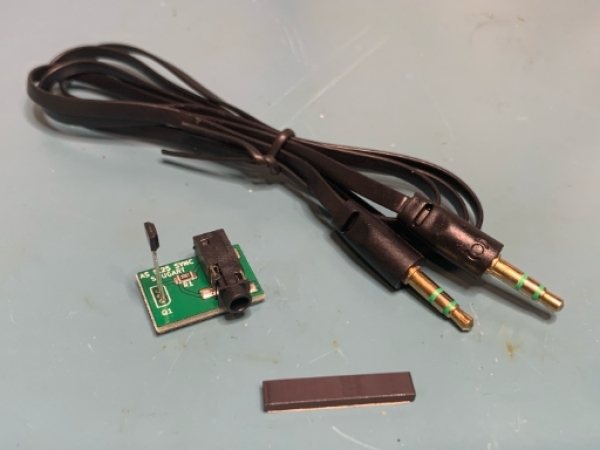
The sync sensor kit comes with 3 components. The sync sensor, cable and an adhesive-backed magnetic strip. You are also going to need some isopropyl alcohol, cotton swab, and some form of cutter for the magnetic strip.
Opening the case
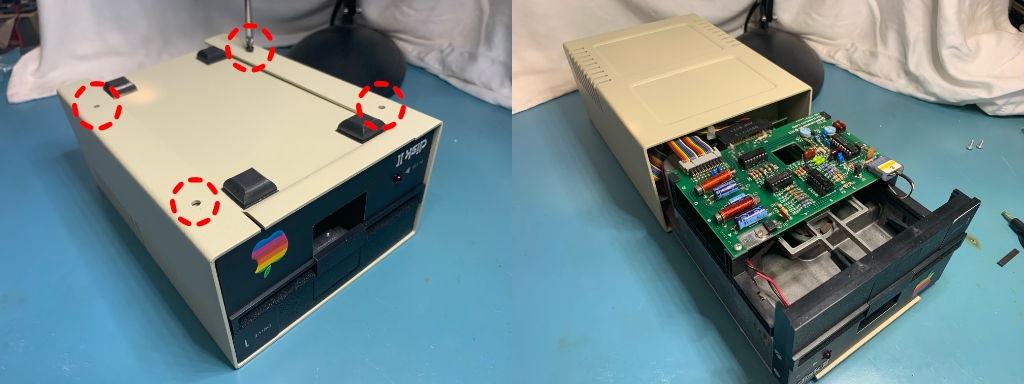
There are 4 screws that need to be remove from the underside of the drive. Then you can flip it back over and slide the mechanism out the front.
Get the analog board out of the way
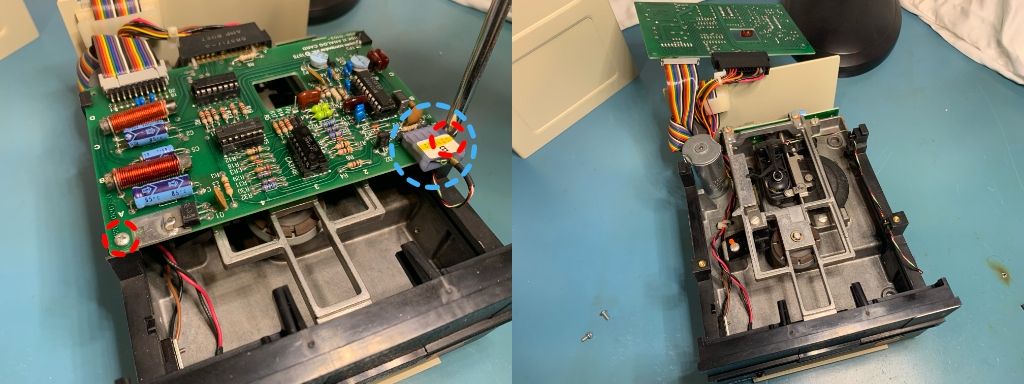
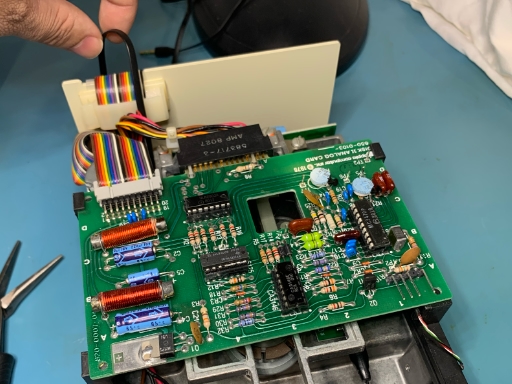
There are 2 screws (circled in red) that need to be removed. Next slide the connector circled in blue towards the front of the drive in order to disconnect it. The analog card is going to be held in place with 2 clips at the rear of the board, you simply need to gently wiggle it free of the clips and then you will be able to lift it up and hang over the back of the drive.
Mounting the magnet onto the spindle
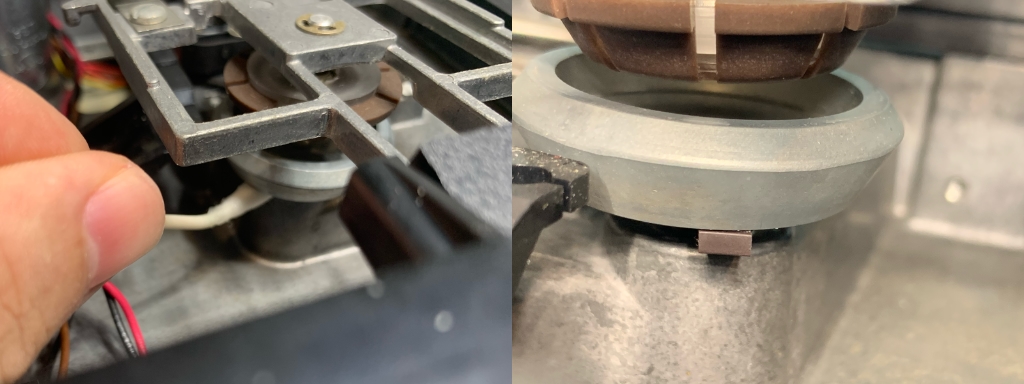
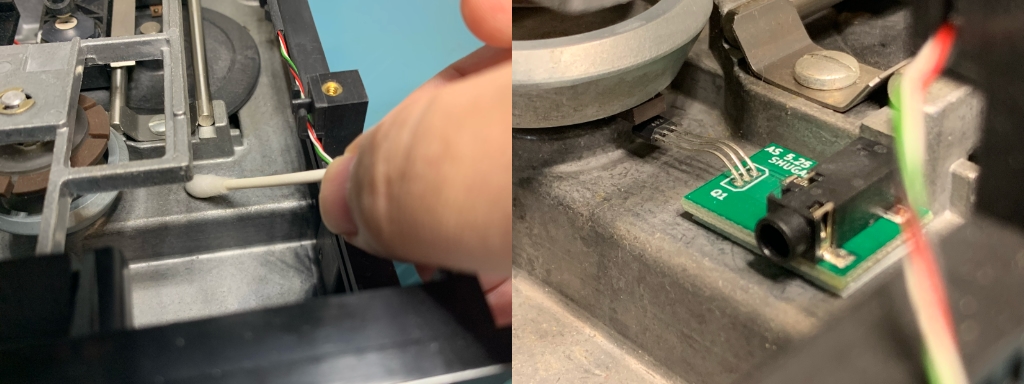
We are going to cut a small square of the magnet strip and adhere it to the spindle. Exactly where on the spindle is going to vary a little bit for each drive, but you basically just need to make sure that wherever you stick it the spindle is free to be able to spin around still. Once you have determined a good location, use some isopropyl alcohol to clean the location well. Wait a few seconds for the alcohol to completely evaporate and then adhere the hunk of magnet to the spindle in the desired position.
Mounting the sync sensor
The sync sensor is going to be mounting on the ledge next to the spindle. If your drive doesn’t look exactly like this, then you are going to have to get clever and find a similar spot. You should use some isopropyl alcohol to clean the area where the sync sensor is going to be located. Now you will want to try placing the sync sensor and bending the sensor leads in order to have the face of the sensor within 1mm of the face of the magnet. When bending the leads of the sensor, remember that they are what the voltage and signals travel through. Make sure that they don’t touch each other or anything metal within the drive!
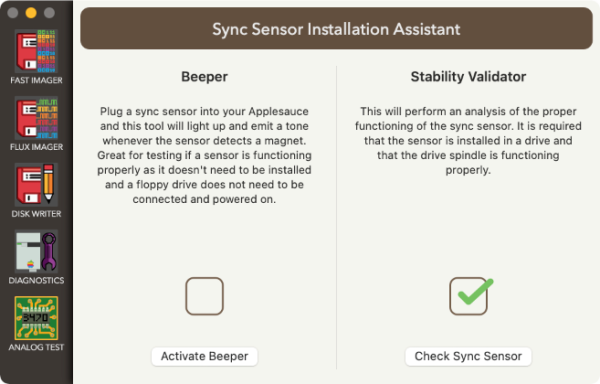
Before you stick the sensor in place, you should test the mounting location. The best way to do this is to connect the sync sensor cable to the sync sensor. Take the other end of the sync sensor cable and plug it into your Applesauce (make sure that the Applesauce USB is unplugged first). Do not connect up the floppy drive! With the cable in, plug in the Applesauce USB and open up the client software. Under the Drive menu, select the Sync Sensor Assistant… item which will show the screen below. Press the Activate Beeper button. Now you can rotate the wheel and a tone will be emitted from your computer whenever the magnet is right above the sensor. Adjust the position/distance of the sensor so that the tone is sounded very reliably. Next move the magnet very slowly across the sensor and ensure that the tone remains solid the entire time. If the tone turns off and then back on in a single pass of the magnet, then it is very likely that the piece of magnet you are using is damaged (this can happen sometimes when cutting it). If all seems to be working well, then it is a good idea to mark the sync sensor location with a pencil in order to mount it in the exact place. Turn off the Beeper. Don’t forget to unplug the USB before you unplug the sync sensor from your Applesauce.
Once you have found the ideal location for the sync sensor, pull off the backing paper from the adhesive pad and stick it into place. Double check that the sensor is still working well.
Fishing the sync sensor cable through the mechanism
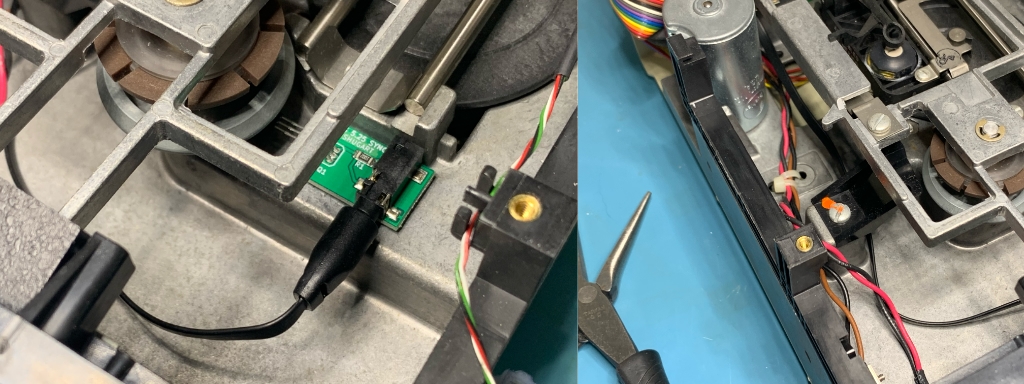
Plus the sync sensor cable into the sync sensor and run it along the bottom of the driving casing to the rear of the drive mechanism.
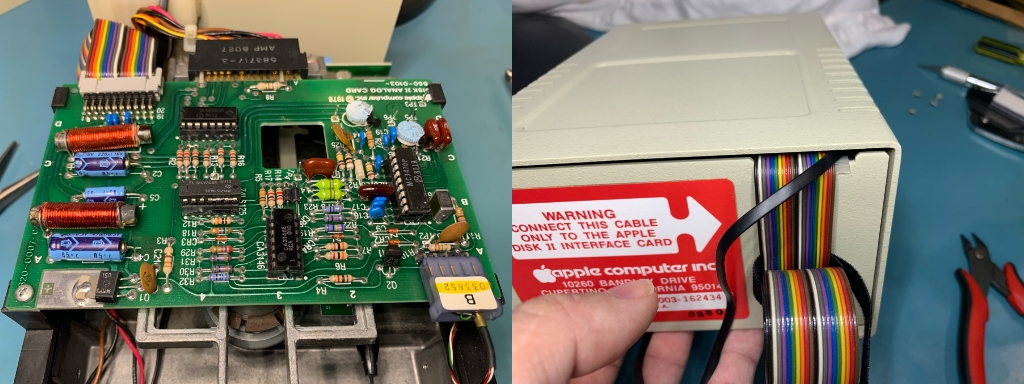
Flip the analog board back into place and fish the sync sensor cable over the edge of the drive at the same place where the drive signal cable exits.
Reinstall analog board and close up the case
Slide the analog board back into its rear clips, and then reinsert the two screws into the front to complete the mounting. Plug the signal cable for the head back into the front right of the analog card. Slide the case cover back onto the drive from the rear. While getting it into position, make sure that you don’t pinch or damage the sync sensor cable.
Test the drive and sync sensor
Now it is time to plug your drive and sync sensor into your Applesauce. Go back to the Sync Sensor Assistant and use the Stability Validator to make sure that the installation checks out good. Once everything seems to be working ok, you can reinstall the four screws on the underside of the drive to finish closing up the drive.
CONGRATULATIONS! YOU ARE DONE INSTALLING THE SYNC SENSOR!
