meta data for this page
Diagnostic Tools
⚠️ This page is incomplete!
The Diagnostic Tools feature provides a mechanism to validate that your drive functions correctly. There are two main sections, a Speed Test to validate the drive rotates at the expected rate and a Check Drive section which walks you through several steps to do an overall drive evaluation. See the Troubleshooting section below if you need help trying to get a drive to pass all tests.
Check Drive
Check Drive will attempt to determine whether your drive is functioning normally. Check Drive requires a formatted disk appropriate for your drive to complete testing. If you don't have a formatted disk, you can use the Disk Writer to create one. When you select Check Drive, the Applesauce client will test whether your drive is connected to the Applesauce device, is consuming appropriate power, reads, writes, has normal head tracking, whether write protect is working, and (for Apple II drives) if a sync sensor is installed.
1. To start, remove any disk from the drive and click the Check Drive button.

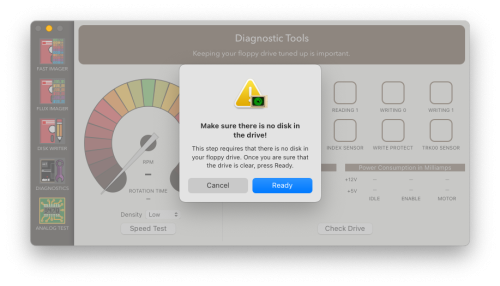
2. You'll see a dialog box asking you to remove any disk from the drive, make sure the drive is empty and click the Ready button to continue.
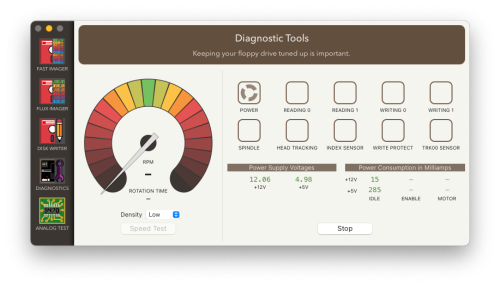
3. Throughout the process, the currently running diagnostic will be indicated by a spinning circle in the corresponding box. The first check will evaluate the power consumed by an idle drive, as shown below.
- The values display at the bottom of the screen below the headings Power Supply Voltages and Power Consumption in Milliamps. The green numbers shown below indicate power levels in the expected range for an idle drive.
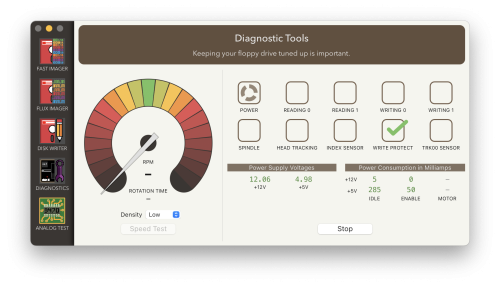
4. You'll be asked to insert an already formatted floppy. The test will write data to the disk, so use a scratch disk you don't care about. The act of inserting the disk will also check the write-protect tab is funcitoning correctly, so make sure you're inserting a disk that is not write protected. You'll also need to make sure the Safe mode switch on the front of the Applesauce is disabled as the drive will be written to as part of this process. Check Drive will overwrite a track on your formatted disk (track $22 on Apple II drives). Insert the disk and then click the Ready button as shown below.
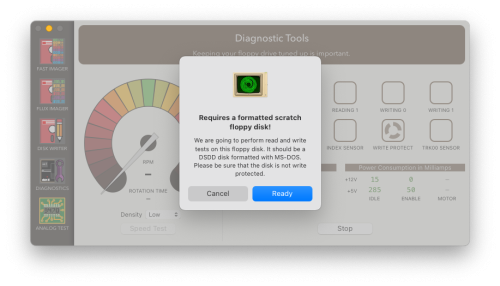
- You should see a green checkmark in the Write Protect tab.
5. The diagnostics will continue to check other functions of the drive. First the Track00 and Index sensors will be checked. If those checks success their corresponding boxes will turn green as shown below.
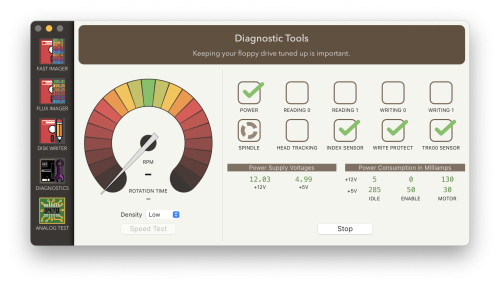
6. The diagnostics will check the spindle speed, indicating the disk is turning at the expected rate. If it succeeds you'll see a green checkmark in the Spindle box as shown below.
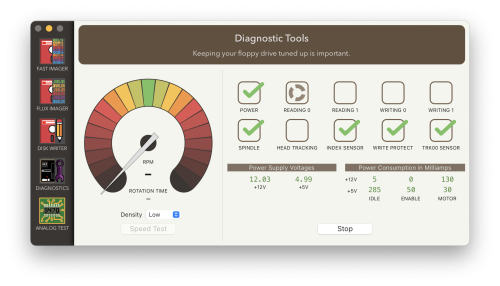
7. The next check tests the ability for the drive to read correctly. It will check the read head on each side of the drive individually. If both read heads pass you'll see green check marks for Reading 0 and Reading 1 as shown below.
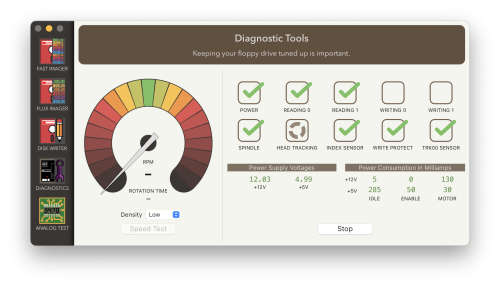
8. While doing the read tests, the drive is also checking that the drive head moves to the correct track. The Head Tracking will go green if the drive head has moved as expected.
![]()
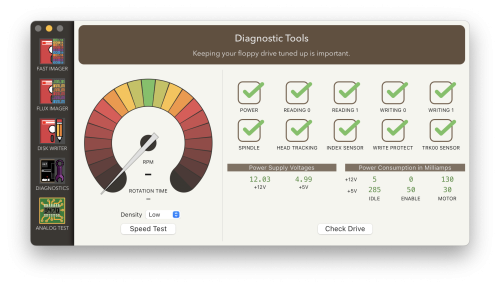
9. The final test checks the drives ability to write data. The diagnostic program will write data to a sector and then read to verify the write worked. If the drive passes all tests you'll see a set of green check marks as shown below.
Speed Test
Speed Test checks that the spindle speed is correct. Expected values:
| Apple 5.25“ double density | 300 rpm/200 ms rotation time |
|---|---|
| PC 5.25” low/double density | 300 rpm/200 ms rotation time |
| PC 5.25“ high density | 360 rpm |
Speed Test will run for a while to allow you to adjust the speed of your drive. Speed test will overwrite a track of your formatted disk if you are using a PC drive or if you are using an Apple II drive without a sync sensor installed. If you have a sync sensor installed, no disk is necessary for the Speed Test. Sometimes PC drives need different jumper settings to let the host control the drive speed, which can result in Speed Test failure if not set correctly.
1. To begin a speed test, insert a disk into the drive and click the Speed Test button.
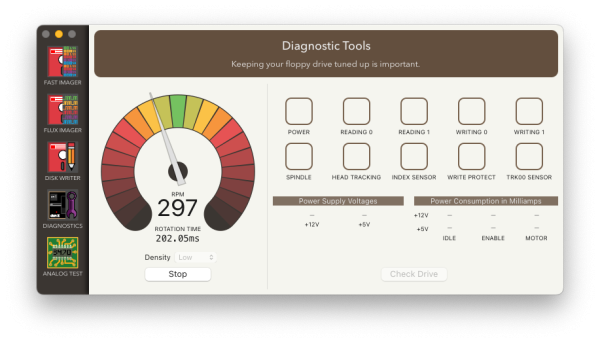
2. A successful speed test will show the needle speed indicator in the green range at the noon position of the speed dial and the RPM will be shown as 300 or 360 depending on drive type, as shown below.
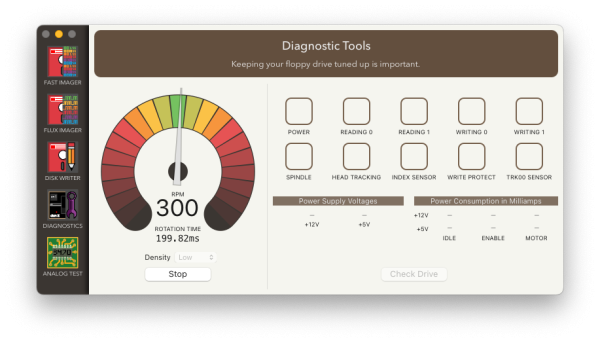
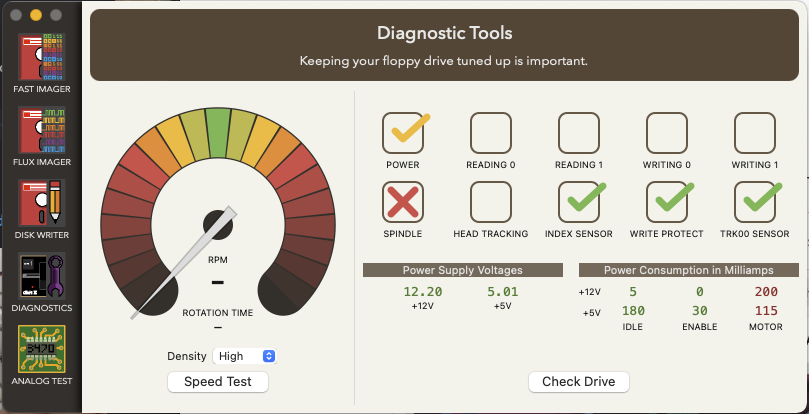
- If your drive is running too slowly, the needle indicator will be to the left of the noon position, and the rpm will be lower than the expected values, as shown below.
- Being in the green indicates a drive performing at optimal levels. A drive in the yellow zone may still be able to read and write disks, though it could have trouble interoperating with certain disks or creating disk readable by computers. Drives in the red will likely not work.
Troubleshooting Drive Diagnostics
- Always power down your drive before you disassemble or attempt to repair it by unplugging the Applesauce unit from USB power.
Power Levels
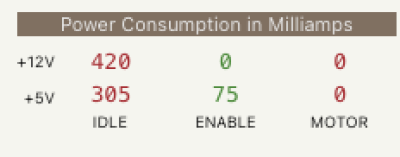
- If your drive has abnormal power consumption (red or yellow numbers instead of green), there may be a hardware issue with the drive. Mechanical issues such as drive rails in need of lubrication can cause elevated power consumption. Careful application of mechanical silicone oil to the drive rail may improve head motion and reduce power consumption. Other lubricants such as WD-40 are not recommended and may be detrimental to the drive in the long run. Yellow numbers are only slightly abnormal, and may still allow for the drive passing the other Check Drive tests.
- In this screen below, abnormal power consumption is demonstrated, which suggests an issue with the drive motor, causing abnormal spindle speed.
Write Protect
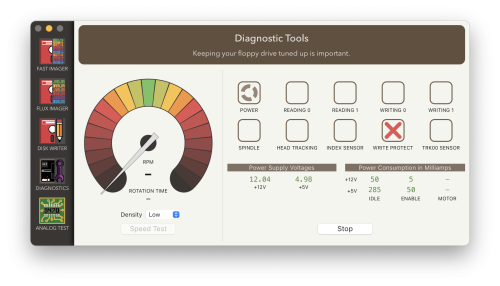
- If your disk fails the Write Protect test, it could be a few cause. First check that the disk is not write protected, your drive will fail the Write Protect sensor check (red X) and Check Drive will not be able to test your drive's ability to write. Some drives have write-protect sensors that can be gunked up by dust, drive oil, or other contaminants. Users have reported correcting this by cleaning the write-protect sensor either with isopropyl alcohol or Deoxit.
Reading 0 | Reading 1
* If your drive fails to read your test disk a red X appears above Reading as shown below, instead of a green check. Diagnostic Tools will not continue to test disk writing or tracking.
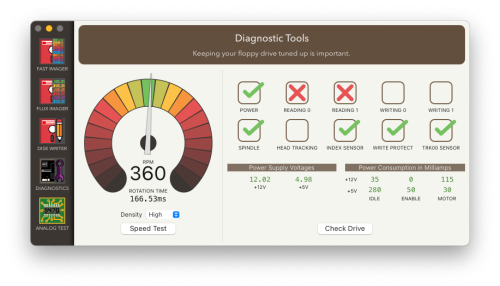
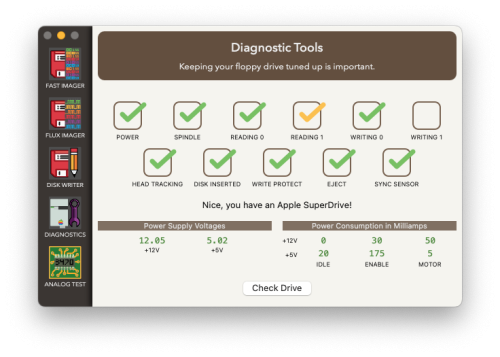
- You might also see a yellow checkmark in either Reading box, as shown below. A red checkmark means that it can't find any sector structures. A yellow checkmark means that it does see sector structures, but it is also seeing a bunch of noise or bad sectors.
- Verify that you have a formatted floppy of the correct density and correct type. If the floppy is not formatted, formatted for the wrong drive, or formatted at the wrong density, Applesauce can not verify that the drive is reading the disk correctly. If you do not have the correct kind of formatted disk, you can try setting the drive profile manually and then using the ''Disk Writer'' to create a formatted disk. Note also that Drive Profiler will overwrite tracks of your disk while performing initial testing, which may interfere with Check Drive read test, unless you use a reformat the disk or use a different formatted disk for testing.
- The most common cause of a read error is a dirty head. Try running the Clean Head routine in Fast Imager with a cleaning disk, or manually clean the head after disassembling the drive. If you are using a 3.5” drive, never attempt to clean the heads manually. Only use a cleaning disk to clean the heads of a 3.5“ drive. Attempting to manually clean a 3.5” drive heads risks knocking the heads out of alignment or damaging the springs holding the heads in position, these parts are more fragile than their 5“ counterparts.
- If you happen to read a disk that contains a significant mold or a degraded disk surface, either the mold or the surface of the disk itself can get stuck to the read/write head. As the head scoots along the surface of the disk stuff builds up on the head which is pressing into the disk surface. When this occurs you'll frequently hear a screeching or grinding noise coming from the drive. Immediately take the disk out if you hear this! Once this build up has occurred, the drive will have read and write problems with all subsequent disks and can often cause bulldozing where the particles stuck to the drive head rip into the disk that caused the problems or future disks you try and read with the same drive. Dirty heads like this can destroy multiple disks if you don't clean off the built up material. Whenever you hear strange noises, stop, inspect the disk for mold or scratches along the disk surface, and try to clean the drive heads.
- If you are using a Disk ][ drive, the next most common cause of a read error is failure of the 74125 IC (same as 74LS125) on the Disk Analog Card inside the disk drive. The 74125 IC may also result in abnormal power consumption in a Disk ][. Occasionally 74125 IC failure results in the drive uncontrollably overwriting Track $00, which destroys disks. The next most common point of failure is the MC3470 IC, which is also on the Disk Analog Card. If can be useful to test these chips by substitution with replacement or known good ICs. The ULN2003 IC, which controls the stepper motor, may also occasionally fail, resulting in absent or abnormal head movement.
Index Sensor
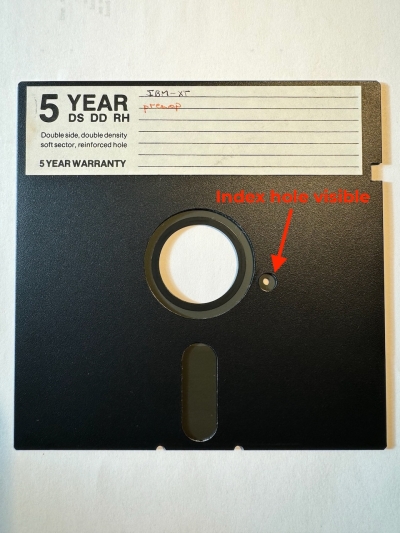
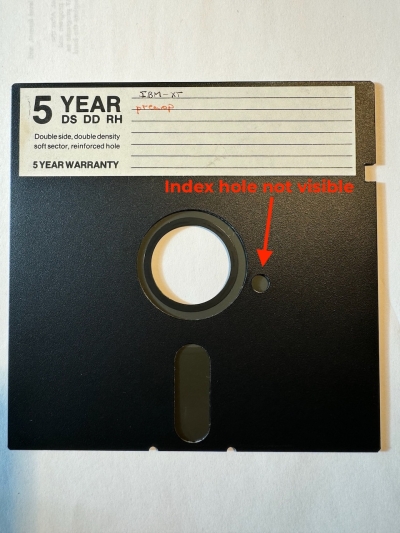
- The index sensor exists on some 8” and 5.25“ drives to both identify where the start of a track begins as well as measure the rotational speed of the drive. Some hard sector disks have separate index holes for each sector, though more common soft-sectored disks only have one hole per disk. The drives have an optical sensor that can detect light passing through the hole when it rotates into view. Each time this hole passes over the sensor, the drive knows it's at the beginning of a track. See the photo below. This method is essential for the drive to understand where it is on the disk and to start reading or writing data from a known position.
The first image shows the disk rotated so the index hole is visible, and the second image shows the disk rotated away from the hole so it is not visible.
- The Apple ][ and some other drives do not have an index sensor as their recording formats don't need to know the start of the track to interpret the data. 3.5” drives also do not use an index sensor. On the bottom of the 3.5“ disk the metal part in the center aligns with the spindle motor to provide a similar set of information about where the start of the tracks begin.
- For drives that do not have index sensors the Applesauce can use a sync sensor to measure rotational speed.
- If the diagnostics fails your index sensor, first double check that the disk is inserted correctly. If you insert the disk upside down it will block the index sensor from being able to see the hole. In addition, the optical sensor can be obscured by dirt or simply fail due to age. Check inside the drive that the index sensor has not been blocked.
Spindle Speed
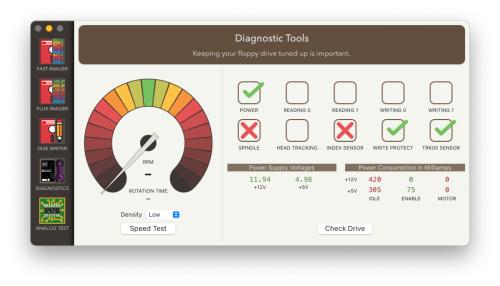
- The spindle motor spins the disk as it's being used. If the Spindle Speed check fails, it could be due to the drive spinning either to slow, too fast, or due to a complete motor failure. If the spindle motor has failed entirely, you'll also see the index sensor failed as well, as shown below. The index sensor can only be checked while the disk is spinning, so if the spindle motor has failed then both of these will turn red together. This might be due to a bad motor, a motor or hub clogged with dried grease, or a failure in the power circuit that feeds the spindle motor. For drives with drive belts between the motor and the spindle, the belts might have loosened or fallen off entirely.
==
TODO
<del>* Explain what all of the measurements mean.</del>
* Explain what all of the tests mean.
<del>* Better troubleshooting.</del>
* Spindle Test: other drive types


