meta data for this page
Advanced Disk Writing
As of Applesauce 1.70, the disk analyzer has a new disk mastering feature. This allows you to write out practically any disk image, including copy protected ones. Originals disks were produced in lots of different ways: some were done on professional disk copiers like Trace machines, and others (especially in the early days) were simply written on normal personal computers running copying software. Many platforms are pretty straightforward in how disks were produced and even copy protected. Other platforms like Apple II are complete and utter insanity. There are also some copy protections that used things like fat tracks which were written in special drives that are simply not going to be possible to write out on typical consumer drives.
With all of the crazy things that can be done with copy protection, writing out such disks isn't a simple “press one button” affair. It takes knowledge of how disks are structured and if applicable, an understanding of how a particular copy protection functions.
The process of mastering and writing a disk is this:
- Load a disk into the Applesauce disk analyzer.
- Add markup to each of the tracks you want to write.
- Send the image to the Disk Writer and write the disk.
Preparing to Master
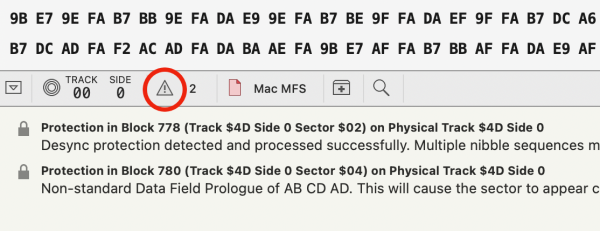
The first thing you are going to need to do is open up your source image in the disk analyzer. Once you have it open, you can check the Analysis Logs to see if there are any hints about the copy protection there. Like in this log, we can see that track $4D is going to need some special attention
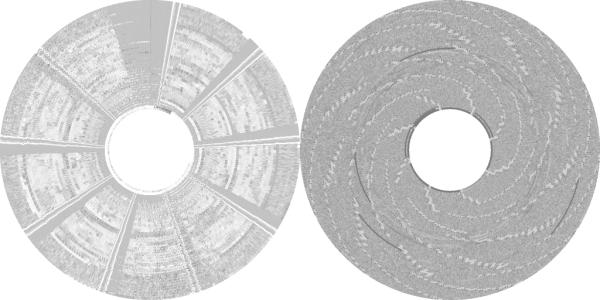
The other thing that you will want to be looking at is how was the disk created. For the most part, there are two primary ways that disk are written: using a fixed disk index (left image) or not using an index (right image). And indexed image writes its sectors beginning at the fixed point on the media, and just lets the sectors end when they end. The indexed image below clearly shows that there are 9 sectors and then a hunk of dead space. On the right image, you can see that there are no lines up sectors (the start of the sectors are actually the brighter areas on the disk). These disks still have the same kind of dead space after the sectors, but it cares more about what it contains since it has to be able to read a track starting anywhere on the disk. So, what it does is write out what is known as a “leader”. This is a fairly large sequence of nibbles (disk bytes) that are written before the start of writing the sectors. And by design the last sector written for each track will cover over the start of the leader ensure that there are written nibbles across the entire track.
For some disk formats like Apple II and Macintosh GCR disks, the leader is composed of synchronization bytes that help the computer to line itself up with the data. If this makes no sense to you, then you may want to find some online resources about how disks are structured.
Marking up Tracks
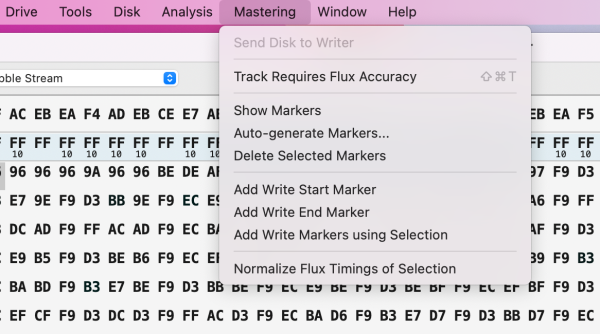
The next step in writing your disk out is the markup. This is the process of adding markers to the track nibbles that let Applesauce know where it should be starting and stopping the disk writes. All of the functions you need for this are contained within the Mastering menu.
Within this menu, you can see that there are functions to manually add and remove the various markers. When the Show Markers item under the Mastering menu is on, the write start (green arrow) and stop (red arrow) markers look like in this image:
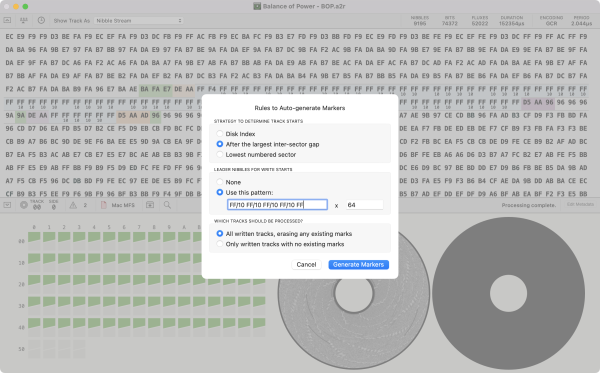
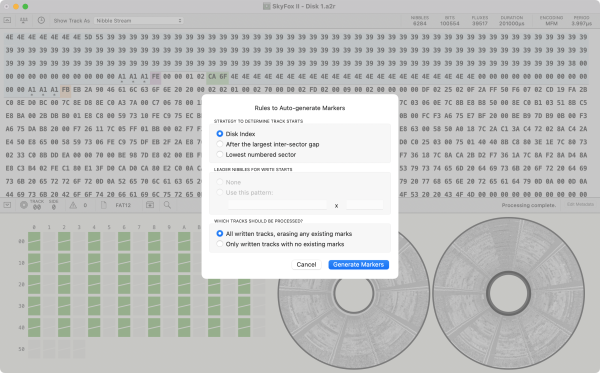
Needing to add markers manually for all of your tracks really would not be fun at all. So, the first thing that we are going to do is have the software do the work of adding markers for us by using the Auto-generate Markers function. The image below is what a typical autogenerate setup looks like for an Apple II or Mac GCR disk. Notice that it is using a leader sequence that matches the one used on disk.
This image is what the settings looks like for a typical indexed disk. It is going to start at the disk index and write out everything through to the end of the last sector.
Now that it has laid out markers for all of the tracks, you can go in and make adjustments as needed for things like special handling for copy protection.
Sending to the Disk Writer
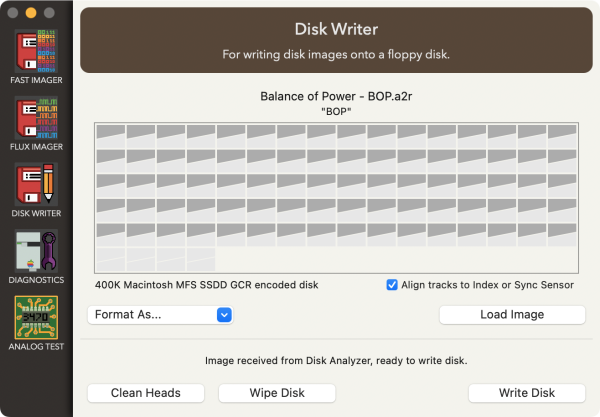
With all of you tracks marked up, you now need to select Send Disk to Writer from the Mastering menu. This will take you to the Disk Writer where you should make sure that all of the tracks that you are expecting to be written are indicated as such.
From here you just need to hit the Write Disk button and wait for it to finish making your disk.


