meta data for this page
Flux Imager
Overview
The Flux Imager creates low-level recordings of disks, an ideal image for archival purposes. The imager records the magnetic flux and timing information as closely to the physical media as possible. This can also be used to create recordings of copy-protected disks where the copy-protection mechanism relies on intentionally invalid data. For example data that would normally violate the operating system's logical format cannot be recorded by disk formats that represent the logical data. For example a sector might have intentionally created sections of flux timings that cause error correction hardware to raise an exception at a particular point in reading a disk. The Flux imager stores data as an .a2r file.
Creating a Flux Recording
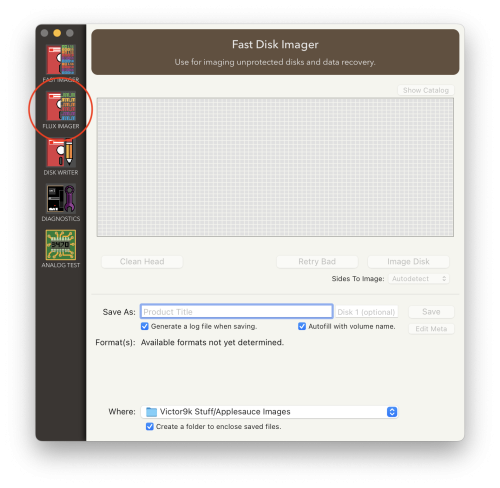
1. Click the Flux Imager button in the left-hand navigation as shown below.
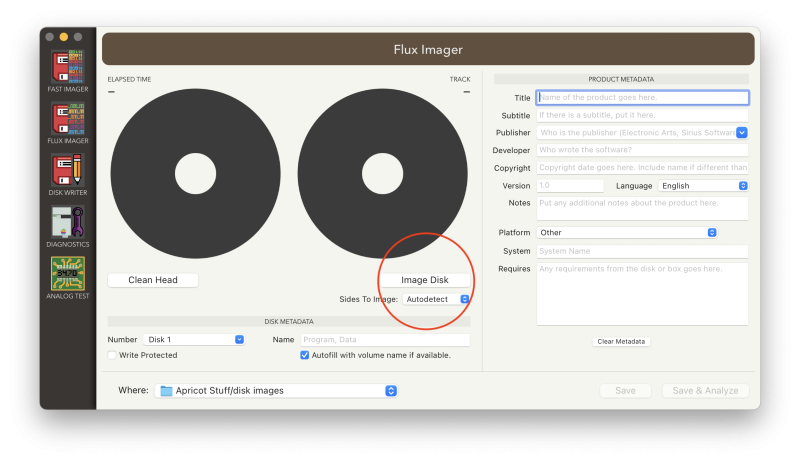
2. Insert the disk into the drive, and click Image Disk button as shown below.
3. The flux imager will start to record the disk. Depending on the type of drive and disk you're imaging, you might see a slightly different representation of the progress.
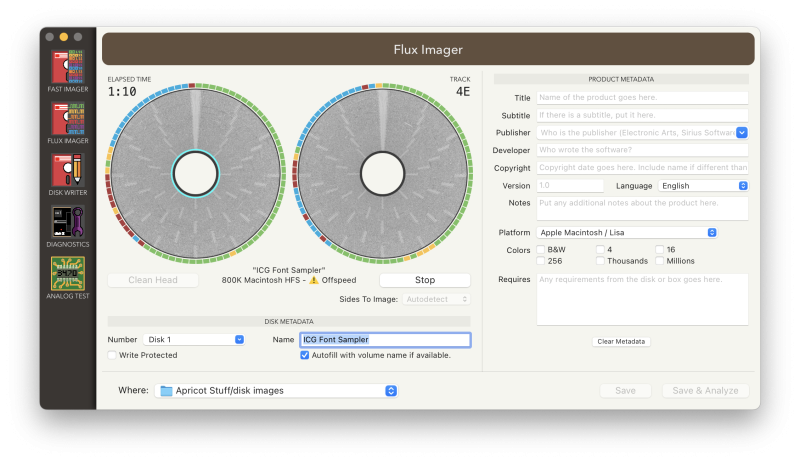
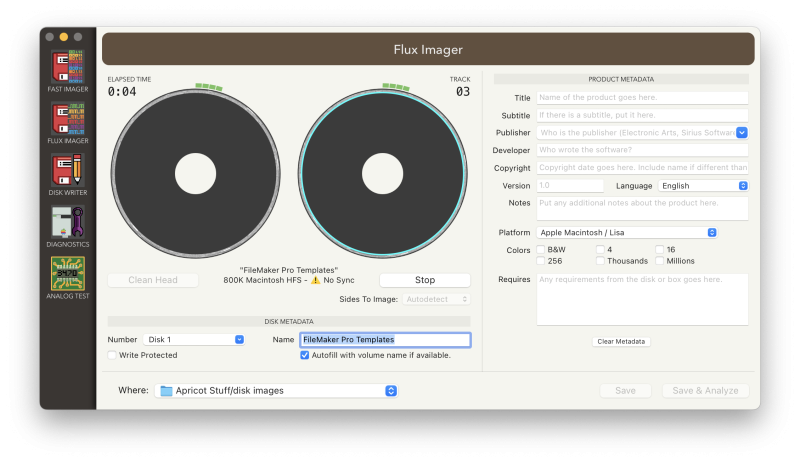
The screen below shows the recording process for an 800K Macintosh HFS disk. First notice the two large circles. These are a graphical representation of Side A and Side B of the disk as it's being recorded. Directly below the circles you can see the name of the disk and the data type of disk detected.
An aqua circle will appear to bounce between the left and right disk images; the aqua circle shows which track is currently being read. After the track completes a visual indicator of the flux transitions is shown as that mottled gray that slowly fills in the circle. This visual representation of the flux image helps represent the organization of the underlying data. MFM, GCR, and other disk types have clearly different visual images.
Finally, as another progress indicator, colored boxes may start to encircle the outside of the image. These are both progress bars and recording health indicators. When the colored bars make a complete circle the first pass of the recording has been made. 3.5“ disks will show these outer progress colors while 5.25” disks will not have these indicators present.
- Green (healthy) indicates the track has been recorded with data that has sector structures, no bad sectors, and low noise.
- Yellow (poor) means that it does see sector structures, but it is also seeing a bunch of noise and/or bad sectors.
- Red (bad) means that it can't find any sector structures.
- Blue (really bad) indicates it doesn't recognize the encoding format (FM, MFM, GCR) of the track at all.
The flux image makes an initial first pass reading of the disk. This initial pass helps the Flux Imager get its bearing as to what's on the disk. While making the first pass the flux image counts the current track in the middle of the screen (shown as 3C in the image below, or 60 in decimal) and displays the elapsed time to read the disk on the left-hand side. The current track count is represented as a hexadecimal number. The below image shows the first pass as it's nearing completion.
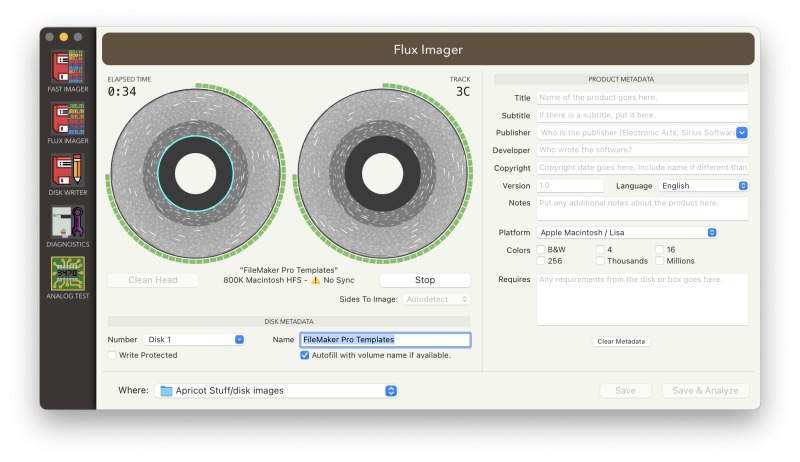
Some disks have complex medleys of various formats, where publishers might have put MFM data in one set of tracks and GCR data in another. After moving across the whole surface of the disk from the outside in towards the center, the imager then reverses the process and takes a second pass through the disk gong from the inside track outward.
During this second pass, the flux imager attempts to interpret the data and make sure that it's read a clean copy of the underlying magnetic fluxes. Due to the potential for noise and timing errors, at this stage the flux imager will make several reads of the same track, comparing various passes to determine the canonical version of the data. If the data appears to be in a known format that Applesauce knows how to interpret, it will retry sections that don't appear to match expected error checking routines. During this phase you might notice outside indicators in yellow turning green, that means on the second pass the initial poor read has been corrected, similarly you might notice red tracks also going yellow or then green. Green is the best outcome, yellow the second best, red, and then finally blue in terms of quality indicators.
As this format is designed to capture potentially intentional errors used by copy-protection mechanisms, AppleSauce will attempt to record accurate representations of blank, damaged, or corrupted data. This can be challenging as some corrupt information has occurred due to physical damage, dirt or mold on the disk, or simply the impact of time. While other data was intentionally corrupted during the disk creation process as part of a copy protection scheme. Multiple passes of each track gives the Applesauce a better sense of how to interpret this messy reality. While doing the second pass the track count decrements from the highest track to the lowest track, meaning it counts backwards. The elapsed time continues to count the total time the imaging process is taking. Below shows an image of the second pass halfway completed, note the aqua circle is traveling in the opposite direction towards the outside of the disk.

4. While the disk is being imaged, you can fill out the Product Metadata on the right-hand side of the screen. Often this can be obtained from the disk label, while sometimes you need to allow the imaging process to be completed to know what's actually on the disk. For archival purposes try to be as complete as possible. Remember individuals in the future may get a copy of the .a2r and might need a serial number, unlock key, or other information that's on the disk label or jacket. More information is always better.
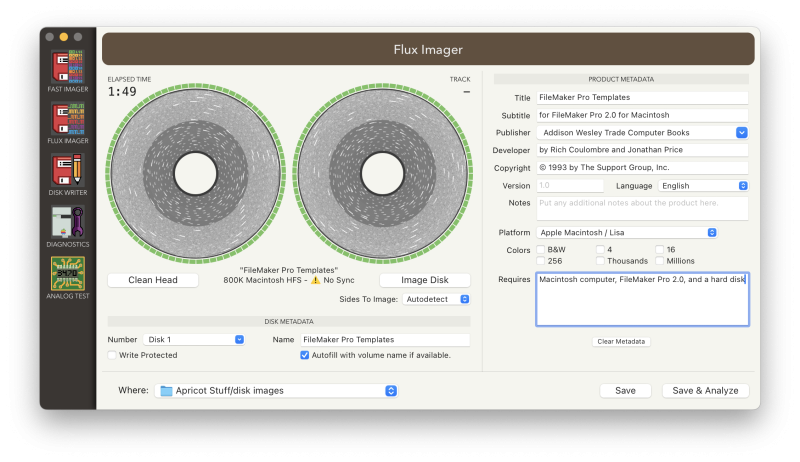
5. When the disk has completed being read, click the Save & Analyze button in the lower right-hand corner of the screen.

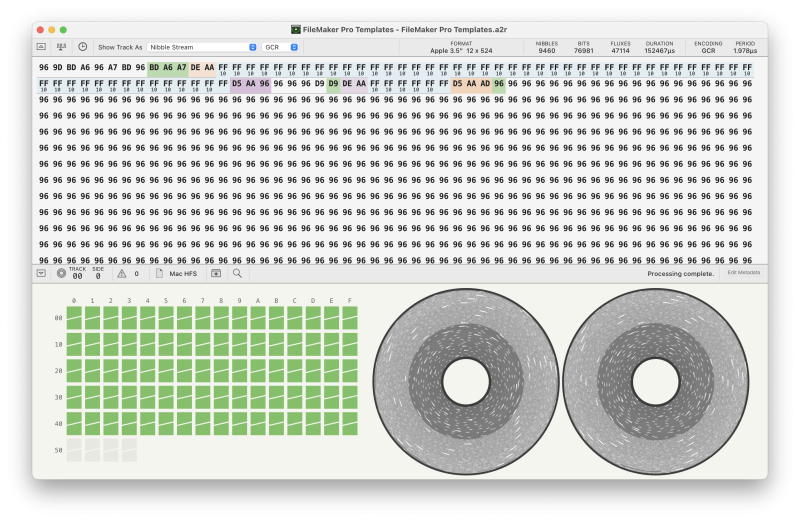
6. The disk will open in the disk analyzer.
Configuration Options
Sides to Image
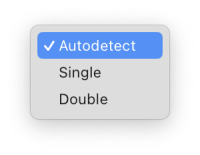
The Sides to Image selector, just below the Image Disk button, defaults to Autodetect. In the autodetect mode the Applesauce reads the first few tracks on both Side A and Side B and attempts to determine if the disk is single or double sided. If the Side B doesn't contain any valid data the Flux Imager will record the disk as single-sided. Occasionally the autodetect will record a disk that's actually single-sided as a double sided disk, often due to a previous use of the same physical media as being formatted for a double sided disk at some point in its life. Conversely, some double-sided disks will be recognized as single-sided because the outer tracks were corrupted or not recognized as valid data while imaging. You can override the autodetect and select Single or Double to force the Flux Imager to record either just Side A with Single or to record both Side A and Side B by selecting Double.
Autofill with volume name if available
Under the Disk Metadata section, check the Autofill with volume name if available checkbox if you want the Name field to be filled in automatically if the Flux Imager detects a disk name. Not all disk formats support a name for the disk itself. If the recording media doesn't have this meta data present this checkbox will do nothing. If you manually enter a value in the Name field that will override the checkbox as the Flux Imager will not override any value you manually input. If the disk has this metadata, simply leave the checkbox checked, leave the Name field empty, and the value will be auto-populated as the imager encounters the name during the recording process.

Example Flux Recording Sessions
Here are some example flux recordings so you can see how the visualization differs between various floppy data formats. In addition, note that the metadata fields change depending on what is selected in the Platform pulldown. This is to help you identify dependencies frequently encountered on each computing platform.
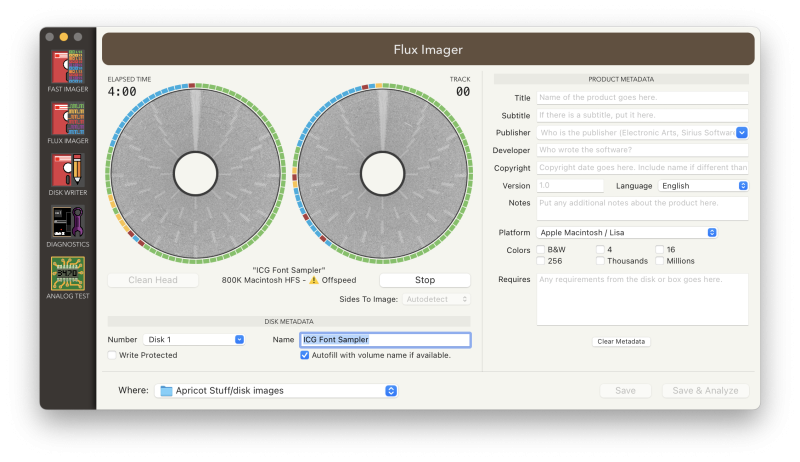
- Below is an example of a poor quality 800K Mac HFS disk. There are two points in time represented. The first image shows the output of the display as the first pass is being completed, at 1:10 elapsed. In the left-hand, Side A visualization, note the red and yellow indicators around the 8 o'clock position. Then in the second image, at 4:00 elapsed, note how many of the indicators in the 8 o'clock spot have improved to yellow or green after Applesauce has made several attempts to recover the data. Since this disk is not copy protected, attempting to recover the data using the Fast Imager would probably prove fruitful. The Fast Imager would allow for more attempts at re-reading the difficult sections of the disk. Also, the Fast Imager would allow attempts to recover the damaged sections with several different drives, where some drives might do better on certain sectors than other drives. Finally, a disk like this should be inspected under magnification to look for dirt or mold. A solid cleaning and/or a drop of cyclomethicone might render this disk fully readable.
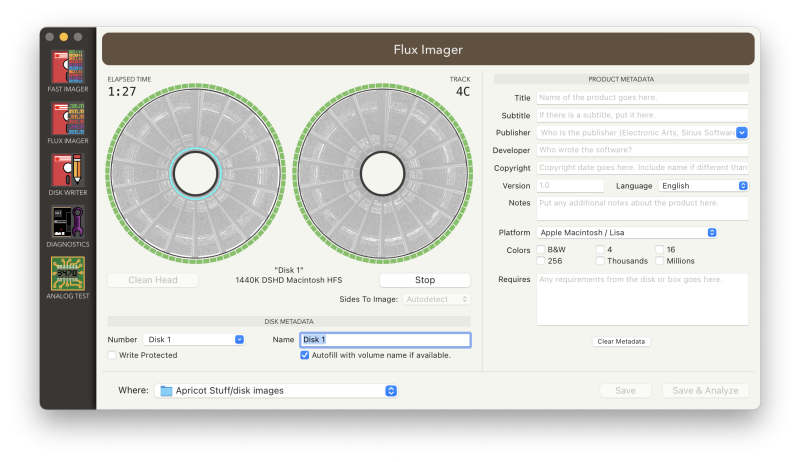
- Below is an example of a 3.5“ DSHD 1440K Mac HFS Disk.
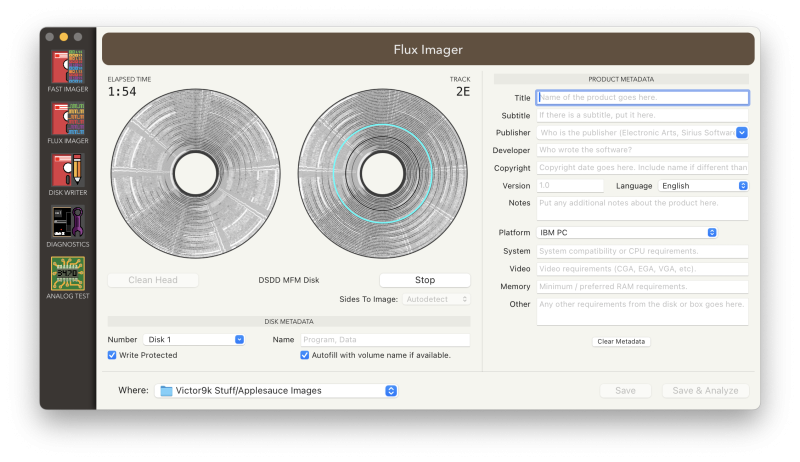
- Below is an example of a 5.25” DSDD 360K MFM IBM Disk. Notice the fading that appears at the 11 o'clock and 7 o'clock positions in the image, this is likely due to either dirt on the disk, problems with the binder, or the magnetic signal starting to break down. Also notice the gray area appears to have banding or stripes. This is due to a double-density disk being imaged on a high-density drive. Half of the tracks will not have data due to the high density drive expecting the data to be more tightly packed, and finding nothing between the double-density track gaps.
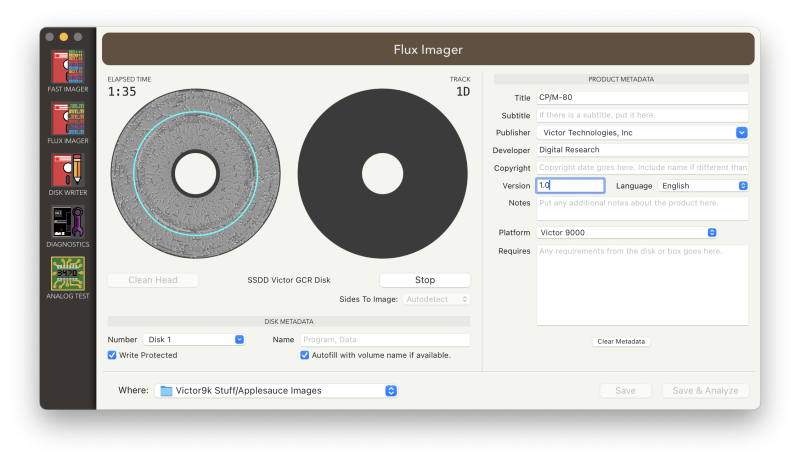
- Below is an example of a 5.25“ SSQD 620K Victor 9000 GCR Disk. Note the right-hand circle is black because this is a single-sided disk with no data on Side B. The Flux Imager tried to read several of the outer tracks on Side B, and when it saw a pattern of no data on the 2nd side it determined it was a single sided disk.
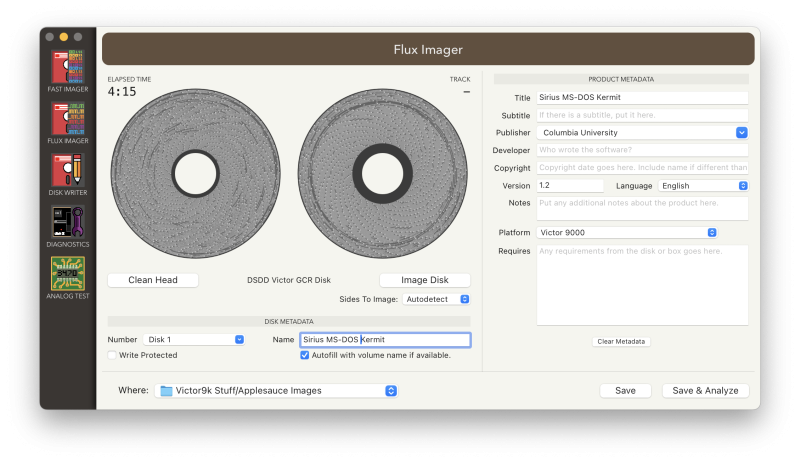
- Below is an example of a 5.25” Flippy DSQD 1.2M Victor 9000 GCR Disk. Note the Flux Imager saw data on both sides of the disk so the autodetect treated it as a double-sided disk. But this is a flippy—meaning the disk was treated as if each side was a single-sided disk. In the vintage hardware the second side was written and read by inserting the disk upside down, hence the name flippy. Only drives that didn't utilize an index sensor could read and write flippy disks. Because of this, when read right-side up by the Applesauce the disk data will be read backwards and the track will be slightly misaligned for the Side B as the upper and lower recording heads are not in the same position relative to the disk. So after imaging the data on the second side will not be valid when read this way.


