meta data for this page
Applesauce Upgrade Kit Revision 2 Install
The process to upgrade a revision 0 or 1 Applesauce into a revision 2 is a pretty straightforward process that can be done with only a Philips Screwdriver (P2 size).
Unpacking Your Upgrade Kit
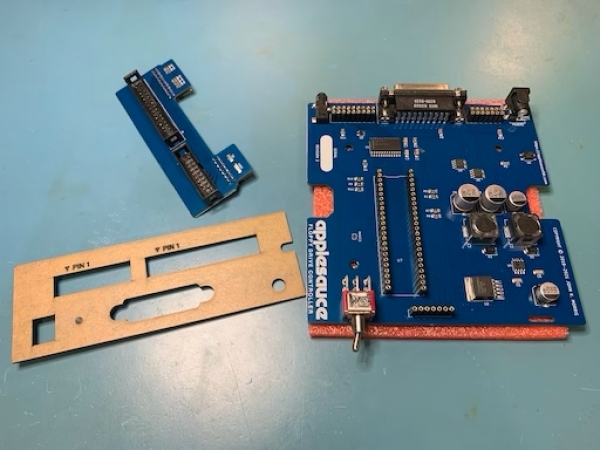
First thing that you will need is an Applesauce Upgrade Kit that contains the following components: a main PCB, rear connector PCB, and a rear panel with a light pipe in it. Also note that you will need a +12V AC/DC Adapter (not included in kit) as the upgraded Applesauce cannot use the original +16V adapter that comes with the revision 0/1 units.
Opening Your Applesauce
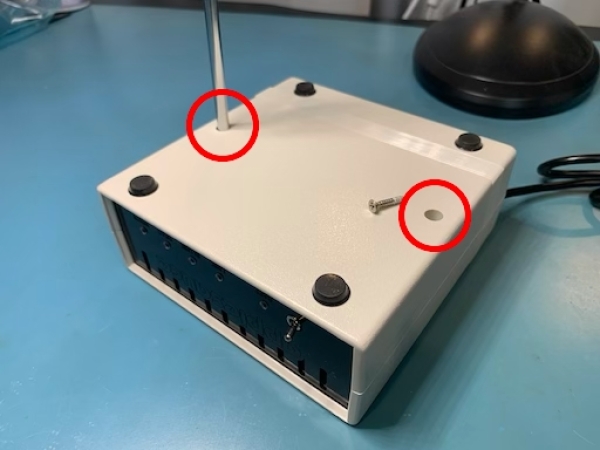
Flip over your Applesauce and remove the 2 screws from the holes on the underside.
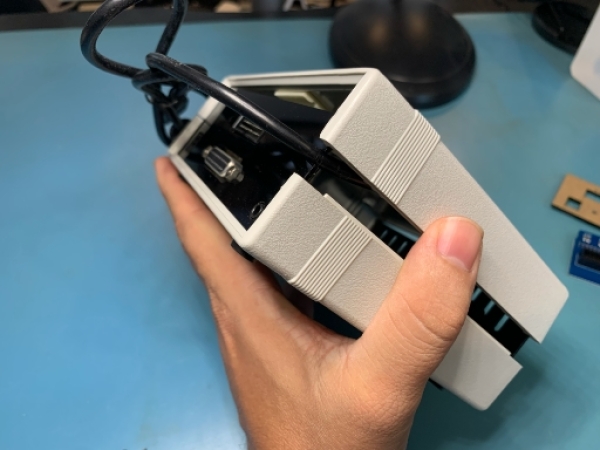
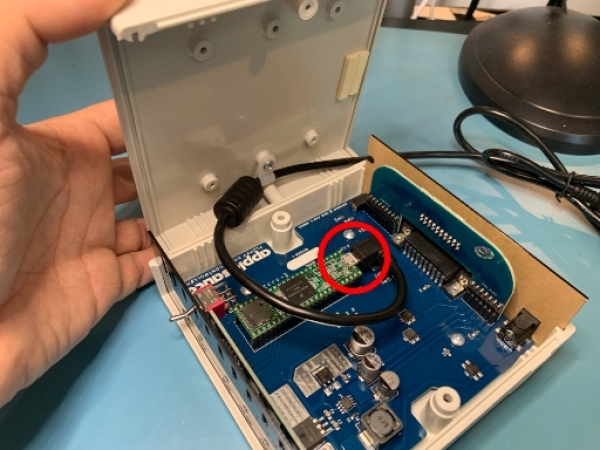
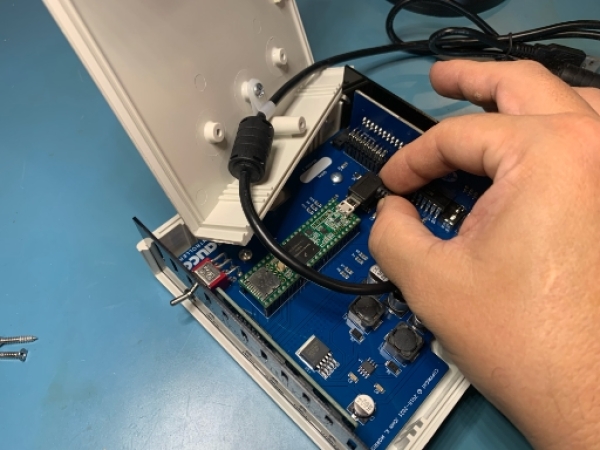
Now you will be able to gently pry off the top half of the case. Note that there is some adhesive tape at the rear of the unit so it may take a little bit of effort to get the lid off. Also, the USB cable is connecting the top half of the case to the bottom so don’t pretend that you are The Hulk and try just ripping things in half. Once you have lifted the top off, you will be able reach in and unplug the USB cable from the Teensy (green board). You remove it by sliding the plug towards the rear of the unit.
Eviscerating Your Applesauce
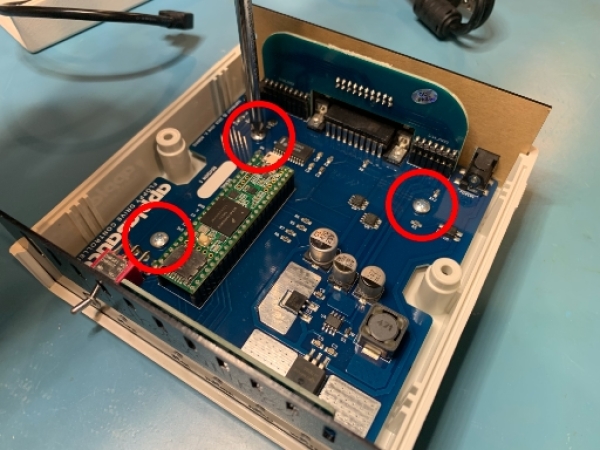
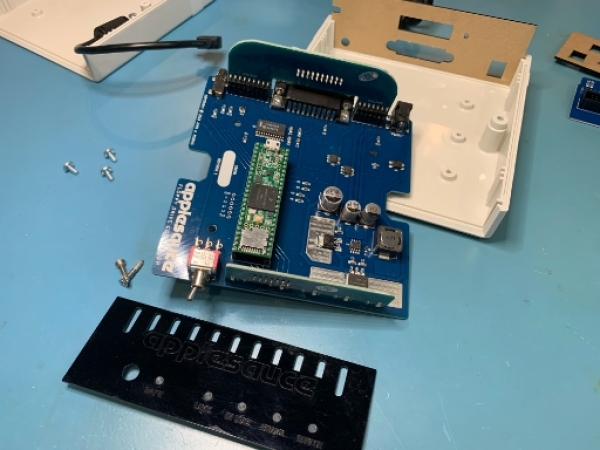
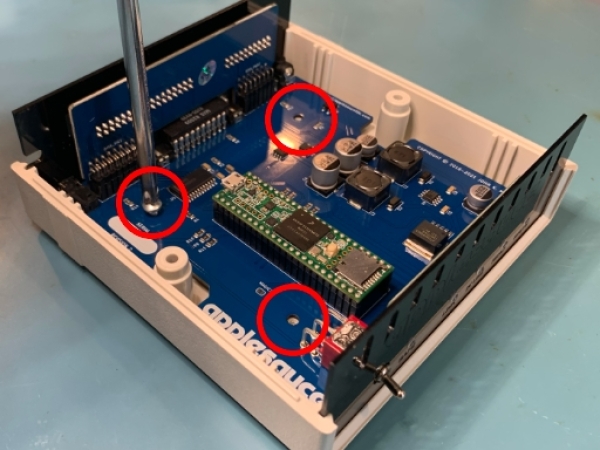
Remove the 3 screws (circled) and remove all parts from the bottom half of the case by lifting them out.
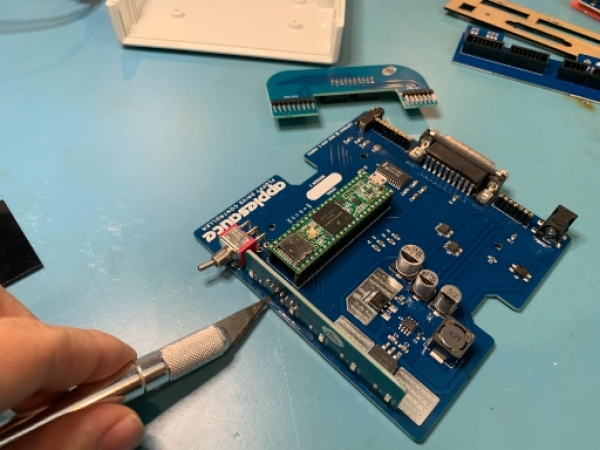
You will need to re-use the small lights PCB which is the vertical one at the front of the main PCB. In order to keep this board in place while shipping, I put a small dab of silicone or hot glue. If you can’t lift the light PCB upwards off of the main PCB, then you may need to use a blade to cut it free.
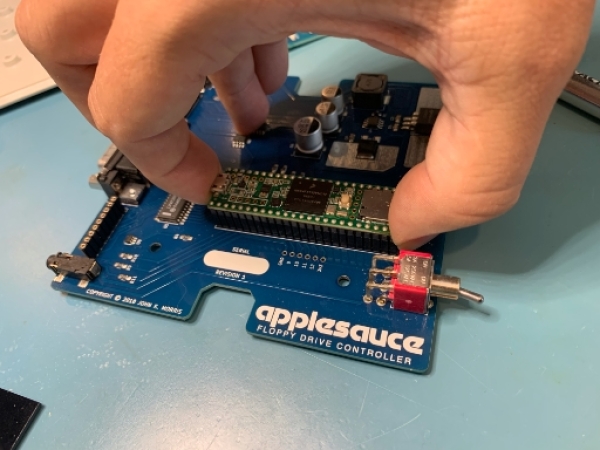
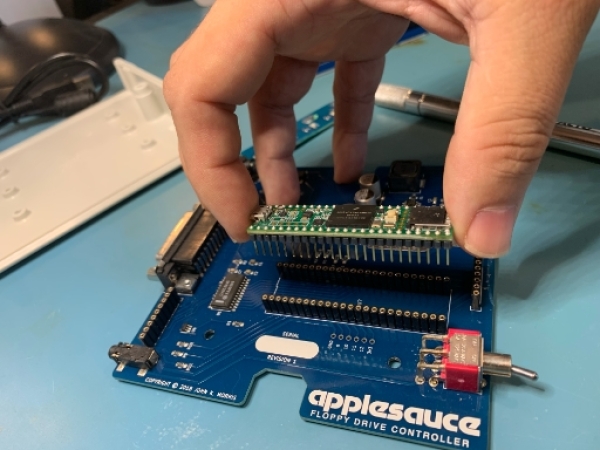
Now comes the most delicate step of this process. Removing the Teensy from the main PCB. There are pins that protrude straight down from the Teensy into the connectors below. You need to grab each side of the green board and carefully lift it straight up. It should be in there fairly tightly, so go slowly and lift up while keeping the Teensy as level as possible. It often helps to do it with two hands as you can have better control that way. You very much want to avoid bending pins or damaging the Teensy.
Assembling the Upgraded Internals
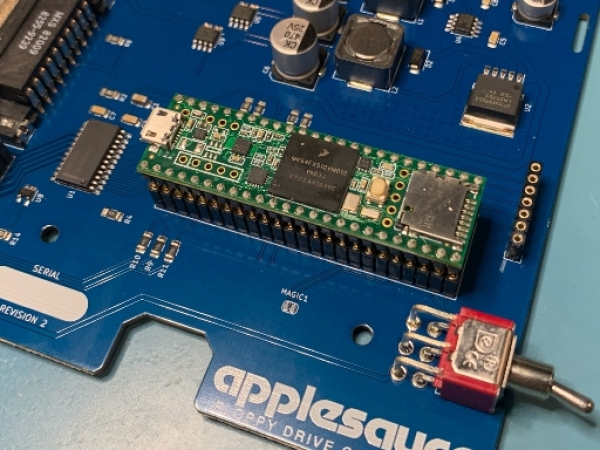
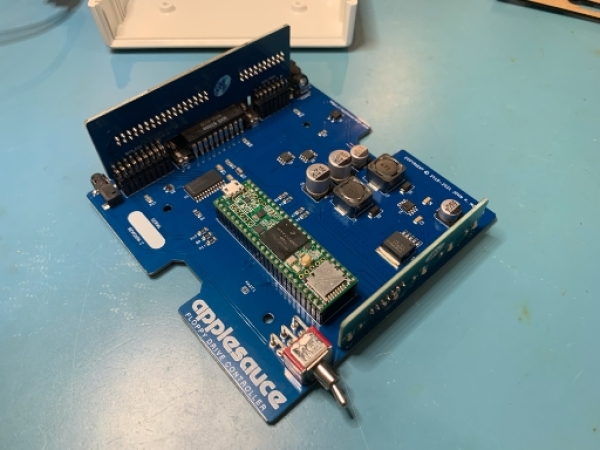
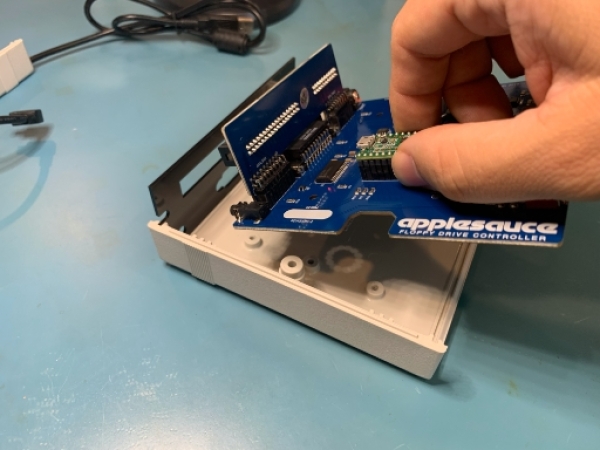
First step is to carefully install the Teensy onto your new revision 2 main PCB. Place the Teensy on top of the connectors making sure that the pins are all lined up with their holes, also be sure that you have the orientation of the Teensy correct with the USB connector facing the rear of the unit (as shown in the picture). Once you are sure that all of the pins are lined up, use fingers from both hands to press it into the connector. Be sure to keep your fingers over the pin areas on top and do not push down on any of the chips as this may damage them. With a little bit of even pressure it should slide right into place. Next, attach the new rear PCB that you got in the upgrade kit. Line up all of the pins and push it down until it is fully seated. It can sometimes be a little tricky to get all the pins lined up, so you may need to wiggle or pull it around a bit to get everything to line up. And finally, insert your old lights PCB into the appropriate connector on the new main PCB. If you want to put a dab of hot glue on it you can, but it does tend to stay in place just with friction unless you have a habit of throwing your gear around the house.
Putting It Back Together Again
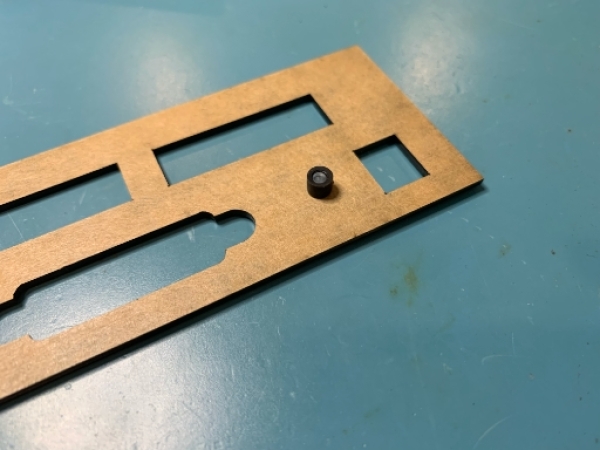
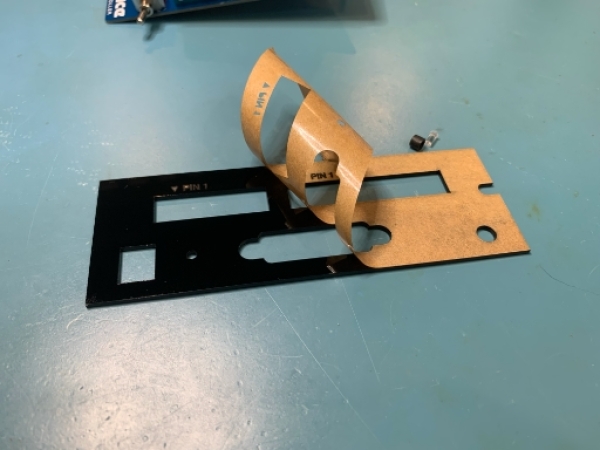
Now that we have the internals put back together, lets prepare to install it into the case. First thing we need to do is prepare the rear plate. The rear plate ships with a light pipe installed in it. You can pull the rubber sleeve off of the light pipe and then push the pipe through to separate it from the rear plate. Next remove the protective covering from both sides of the rear plate. And finally reinstall the light pipe by sticking it back through the same hole and putting the sleeve over it to keep it firm. You want to be sure the the flat side of the light pipe is on the outside of the plate (the side with the PINS 1 writing on it) and that the sleeve is on the inside.
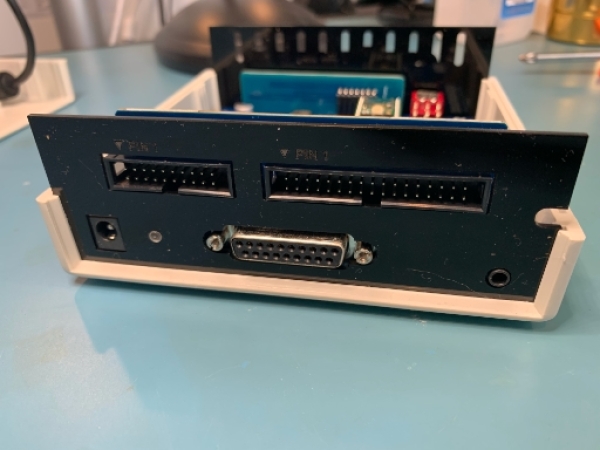
Place the rear plate into the slot at the rear of the case. You can tell the rear of the case by the ribbing on the outside of the case which is closest to the rear. You can then slide the internals into the case at an angle to seat with the rear panel. At the same time, you will want to place your old front panel over the switch and make sure that it sits in the front slot. Double check that the connectors are all properly lined up with their holes.
If everything looks good, then it is time to screw the internal assembly into place. The best way to do this while ensuring that the assembly is aligned properly is to get a screw started in all three holes first, and then go back to snug them down. These are metal screws going into plastic, so be sure not to over tighten them as you can strip the hole.
Wiring It Up
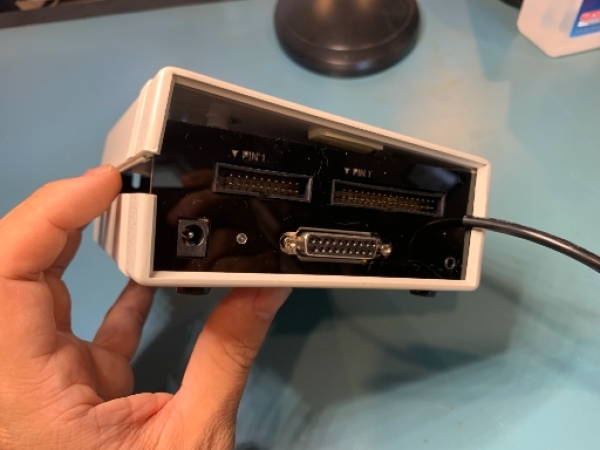
Now bring the top lid over and plug the USB cable into the Teensy. Then slip the USB cable into the slot in the rear panel. There should be a dent in the cable where it was seated in the slot before, reuse this position. You can then flip the lid into place.
Testing, Closing It Up, and Celebrating
Now is a great time to connect the Applesauce up to your computer to make sure that it is working properly. Be sure that you are using a +12V AC/DC adapter. You want to be using client release 1.50 or higher. If all seems to be functioning, then it is time to put the screws back into the bottom of the case and pat yourself on the back for a job well done!


